Saturday, November 26, 2011

DIY Week: Day 7 - Bows..

What you need:

  • Some to-die-for heels
  • Satin bows in a variety of sizes from your local craft store
  • Glue
This one is super easy, glue the bows, starting with the smallest at the bottom and work your way up using the bigger sized bows. Super quick, super easy and super gorgeous!


alexismabilledotcom2


Friday, November 25, 2011

DIY Week: Day 6 - Ribbons

What you need:

  • Ribbons
  • Shoes

This one is really simple, all you need to do is get two long pieces of ribbon and wrap them under your shoe and around your ankle, then fasten with a double knotted bow! What's great is that you can change the ribbon to match your outfit!


Thursday, November 24, 2011

DIY Week: Day 5 - Crystals

You will need:

  • Crystals
  • Industrial strength glue
  • A sexy pair of shoes
  • Jewel setter or tweezers
Step 1: Glue the crystals around the border first using your jewel setter or tweezers


Step 2: Start filling the crystals in..


Step 3: Continue to any other areas you would like to cover and voila!


Wednesday, November 23, 2011

DIY Week: Day 4 - Silk Flowers

Anyone who can thread a needle and simple-sew can make their own silk flower. I used:
  • Fake flowers of choice from craft store
  • Purple thread
  • Pins
  • Bling beads from craft store
  • Hot glue
  • Felt
TIP: When you go to the craft store for your supplies, look for fake flowers that can be easily pulled apart. Most fake flowers are made with a plastic center and fabric flower petals stacked and then backed by another hard green plastic piece. I would recommend looking for fake peonies, rannucluses or other large fluffy looking flowers. I would not recommend using fake roses, mostly because the fake petals are so tightly packed, you may not be able to get the soft look that is very IN right now.

Step 1: Start with popping the flower heads off the stems:

Step 2: Then, pull apart the flowers themselves so you have loose fabric petals.
Play around with the petals, stacking them into a shape you want. You can use less or more depending on how full or fluffy you want the flower, or you can use less of the larger outer petals depending on how large or small you want your flower.

Step 3: Once you have a stack that looks good to you, pin the layers together so the stack stays together the way you like it.

Step 4: Once you have the layers stacked, starting from the underside of the flower, start sewing a simple stich in the center to get the pieces to hold together. After about 5-8 pass-throughs, get out your bling.

Step 5: Hot-glue a small piece of felt to the back.


DIY silk flower shoes :  wedding diy shoes flower Filt Flower

Step 6: ...and some bling to the front..

Step 7: Put hot glue onto the felt and glue to your shoe! (allow a few hours to dry).

DIY silk flower shoes :  wedding diy shoes flower Flower Shoe

DIY silk flower shoes :  wedding diy shoes flower Flower Shoes


Source: Wedding Bee


Tuesday, November 22, 2011

DIY Week: Day 3 - Feathers..

What you need:
  • Shoes! I recommend simple shoes, so the feathers can be the highlight.
  • Feathers in different lenghts! I took marabou feathers, they’re pretty and soft
  • Something "bling"! Tip: Don’t take something too big, I bought some hairpins with a rhinestone attachment, I could easily remove
  • Felt in the color of your feathers
  • Hot glue gun
Step 1: Cut out a felt triangle.It’ll be later attached to the shoe like in the pic below. The numbers are important for the next steps.

DIY marabou feather shoes (feather piece also suitable for fascinators!) :  wedding diy shoes fascinator feathers fancy Shoe Overview

DIY marabou feather shoes (feather piece also suitable for fascinators!) :  wedding diy shoes fascinator feathers fancy Felt

Step 2: Start with felt side #1. Take the longer feathers and hot glue them to felt side #1. Pay attention to how the feathers are bent – see pic.

DIY marabou feather shoes (feather piece also suitable for fascinators!) :  wedding diy shoes fascinator feathers fancy Felt Side1

Step 3: Now you proceed to felt side #2 and attach the feathers semicircular – now the feather you take have a medium length.

DIY marabou feather shoes (feather piece also suitable for fascinators!) :  wedding diy shoes fascinator feathers fancy Scheme


Here’s an illustration how to proceed further. After the first row of feathers (purple) you put a second row on the first (pink).

DIY marabou feather shoes (feather piece also suitable for fascinators!) :  wedding diy shoes fascinator feathers fancy Scheme2

Step 4: After this you should see no felt any more. Please pay attention: For the second shoe everything has to be the on the opposite side!!

DIY marabou feather shoes (feather piece also suitable for fascinators!) :  wedding diy shoes fascinator feathers fancy Feather Puffs

Step 5: Now you might want to put something on the spot where the feathers of the second row meet to hide it. Just hot glue it on that spot.

DIY marabou feather shoes (feather piece also suitable for fascinators!) :  wedding diy shoes fascinator feathers fancy Feather Puffs Bling

You can also use the feather piece as a fascinator if you just attach a pin!
Step 6: The last step is to hot glue the felt triangles to the shoes!

DIY marabou feather shoes (feather piece also suitable for fascinators!) :  wedding diy shoes fascinator feathers fancy My Diy Shoe1


Source: Wedding Bee

Monday, November 21, 2011

DIY Week: Day 2 - Shoe clips..

DIY shoe embellishment flower pom pom vintage lace and brooch clip

What you’ll need:
- 1/2 yard of white or ivory lace (can do variations with any style/color fabric, or purchase vintage lace tablecloth)
- Thread and needle
- Hot glue gun
- Scissors
- A little bit of white or ivory felt.
- Vintage earrings or brooches
- Needle-nosed pliers
- Any pair of shoes that need a little dressing up!

DIY wedding shoes clips

Instructions:

Step 1: Cut the lace into pieces that measure approximately 3 inches long by 2 inches wide. You can play around with these sizes to make fabric flowers bigger or smaller, as desired. You will need about 6 of these per flower, 12 total.

Step 2: Fold the pieces in half and tie some thread around the middle and secure with knot.

Step 3: Take one of fabric pieces and place on top of another one, middles together, and perpendicular to each other, forming an X. Take needle and thread and put a could stitches through where the middles meet. Once you’ve got it secure, add another fabric piece in the same manner, filling in the holes, and add a few more stitches. Do this until all fabric pieces are used. Fluff the newly formed flower. Repeat for second flower.

Step 4: Take the scissors and trim the edges of the flowers, creating a rounded shape. Trim off any stray pieces.

Step 5: Cut out two pieces of felt about the size of a quarter, and glue to the bottom of your flowers, for extra hold.

Step 6: Use the needle nosed pliers to remove the back fasteners of the earrings. The ones I used were clip on’s so I had to remove the clip part. If they are regular earrings, you may have to clip off the point. Be careful not to damage the jewelry too much.

Step 7: Put a nickel sized dollop of hot glue on the back of the earring, and place firmly in the middle of the fabric flower. Hold for a few seconds, and then set down face up to make sure it dries in the right place. Repeat for each flower.

Step 8: Glue each flower to the top of each shoe. Press firm, let dry. Once the glue is dry, you can put a couple discreet stitches through the flower into the shoe, for extra hold. Be sure to start from underneath, so the thread knot doesn’t show.


Source: Ruffles

Sunday, November 20, 2011

shoe of the day...black studded heels


DIY Week: Day 1 - Glitter shoes...

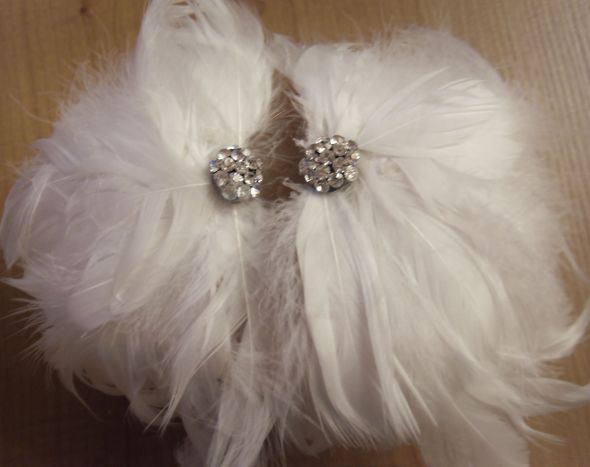
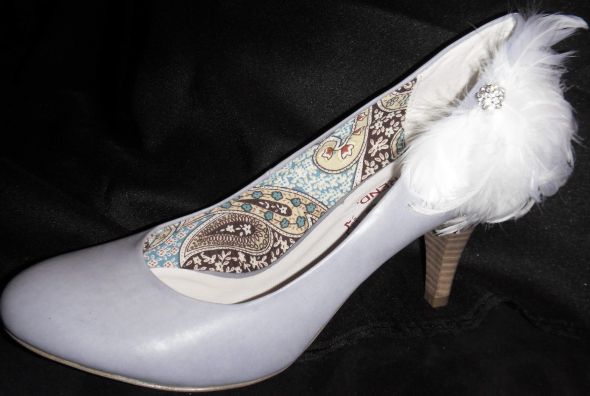
Like any other thing our shoes also get worn out with time. No matter how carefully you wear them, how many shoe safety measures you follow your favorite shoes will grow old with time leaving you no option but to buy a nice pair of shoes again. Sometimes, you wear one of your favorite pairs of shoes all the time just because you like them, due to comfort or style. But that day will come when you know in your heart that your shoes' life is over but you don’t want to leave them or throw them away. I decided to save you this heartache by deciding to do a DIY week. Everyday this week I will post a way for you to give new life to your shoes or a fun and easy way to create a designer look using cheap shoes!

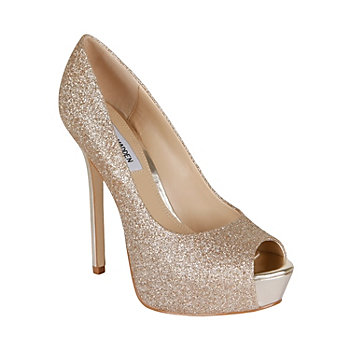
The Inspiration: Steve Madden Glitter Heels - $129


Do it Yourself:

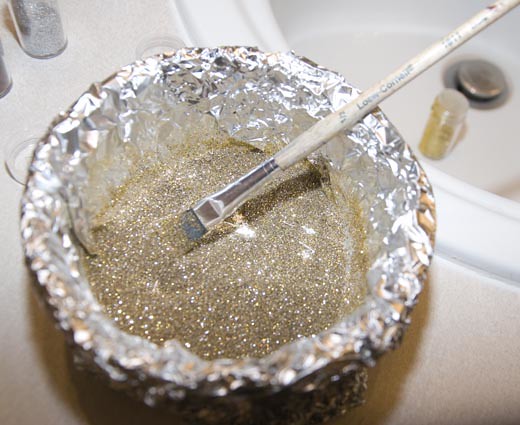
You'll Need:- Extra Fine Glitter
- Mod-Podge (Gloss-Lustre)
- Pair of Shoes
- Sand Paper (or a nail file)
- Bowl
- Paintbrush (I didn't use the paintbrush above, it was too big)
- And something to cover your work surface (I used tinfoil)

You should probably sand the shoes just to make sure that the glitter and glue can adhere to the shoes as best as it can. I didn't actually have sand paper and rather than waiting until I got some... I used a nail file. It did the job just fine, so there you go.

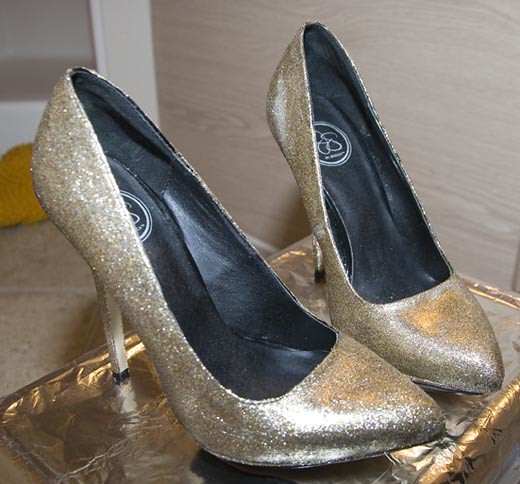
Next I sorted through the glitter I bought to decide which colors I wanted to use. I decided on a few goldish tones, silver, and a little of one of the reddish tones. That's the beauty of DIYing these shoes instead of buying them. This way you can make them whatever color you'd like instead of settling for the colors that the designers have decided on.


DIY GlitterShoes4

Just mix the glitter together in whatever combination you'd like. I wanted a platinum color with a little bit of a darker gold tone when the light hit it just right, so mine was mostly a mixture of the gold and silver with the reds and darker golds thrown in as low lights. There really isn't an exact measurement for any of this. You just have to sort of use your best judgment. As you can see I mixed the glitter first and then added the Mod-Podge, but I'm sure you could do it the other way as well.

Once you've mixed in the Mod-Podge just start brushing it on the shoes. I wasn't sure how to do this exactly. I brushed it on it kind of thickish strokes, and in hindsight I probably should have done it in thin coats and then let it dry and added a second. I also think I might have used too much glittery because it started to get a bit clumpy towards the end.

DIY GlitterShoes6

Aren't they so pretty! If you inspect them closely you can tell that there are spots where the glitter is thicker or thinner, but unless you get really close you really can't tell at all. I had originally planned to go over them with a coat of plain Mod-Podge because I thought the glitter would flake easily, but when I rubbed my hands over them after they had dried none of the glitter came off on my hands. I'll let you know how they stand up to wear.

And the best part? Since I owned everything but the glitter it cost me under $10! Which is more than $100 saving since the Steve Madden's I've been oooing over are $129.

EDIT: many people have been asking how these do over time and wear. I have wore these quite a few time over the months I've had them and so far I have lost very little glitter. And the only time I really noticed it was because I caught my shoe on a rock and fell down and scrapped the side of the shoe (I'm really clumsy). But in my experience with them they hold up well over time and even in the elements. They are puddle approved! Thank you all for sharing your love and how you've used the tutorial! I get very excited whenever I hear that it has been on use to someone!


My new shoes!!


Friday, November 18, 2011

Hellooo Summer!!

It seems that summer has finally arrived in Cape Town, it's lovely and hot here! Ruthie Davies' new collection is just as hot and very summery, doesn't it just make you think big sun hat, maxi dresses?!


And just in case you need some summer where you are, here is a picture of gorgeous Cape Town on a summers day (with Table Mountain, one of the new 7 wonders of the world)


The elegant beauty of Forever New

Forever New is one shop I cannot walk past without falling in love with everything I see. I love the femininity and elegance of their clothes and shoes, aren't these shoes just too beautiful?