Check out these cute colourful bags now in store at Mr Price!
Plus here is some inspiration on how to work the bright bag look:
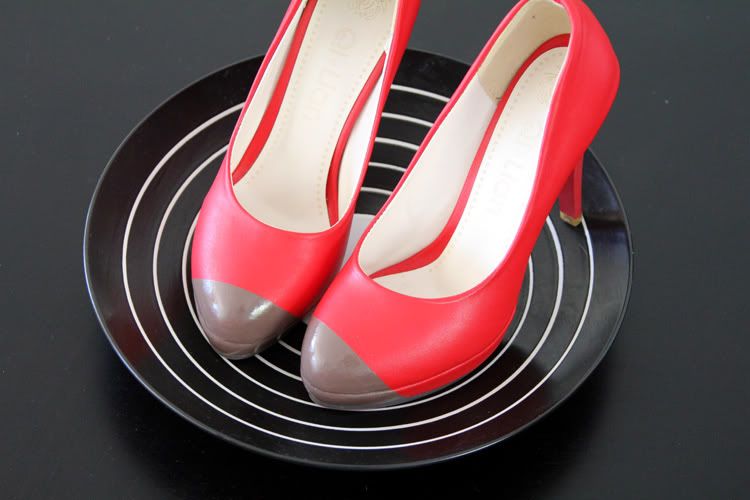
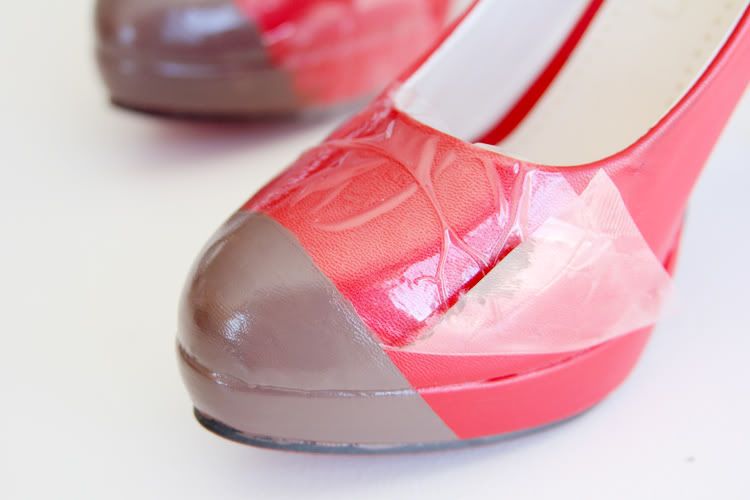
Here's how to make your own colour block clutch:
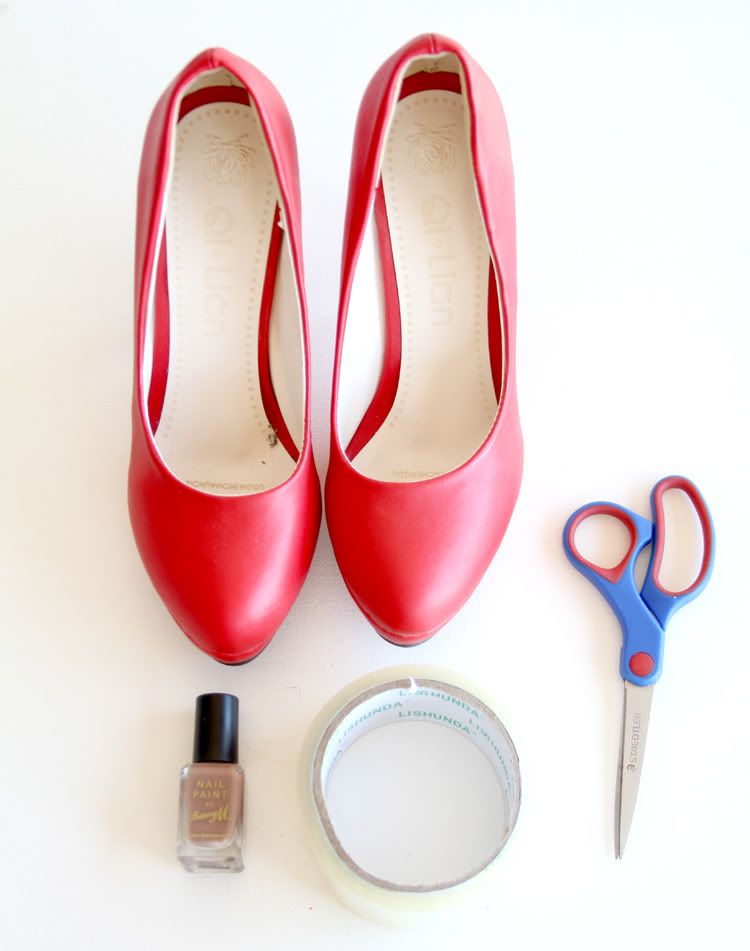
Step one: All you need is a leather pouch, acrylic paint in white and the color bright color of your choice, paint brush, painters tape, blow dryer & acrylic coating spray (shown later)
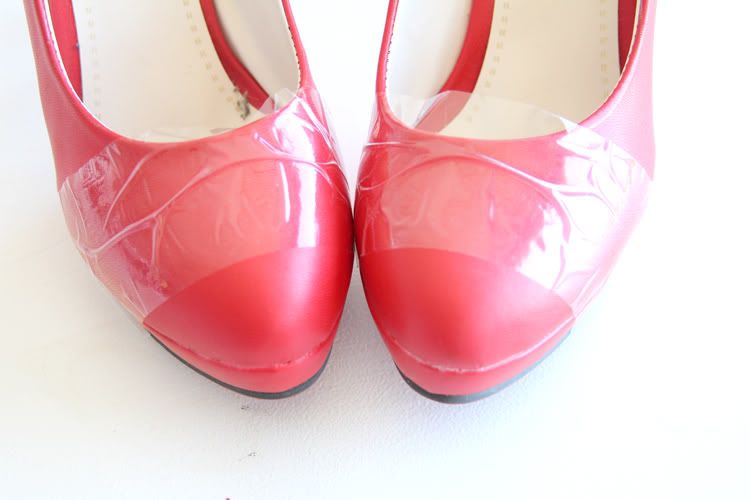
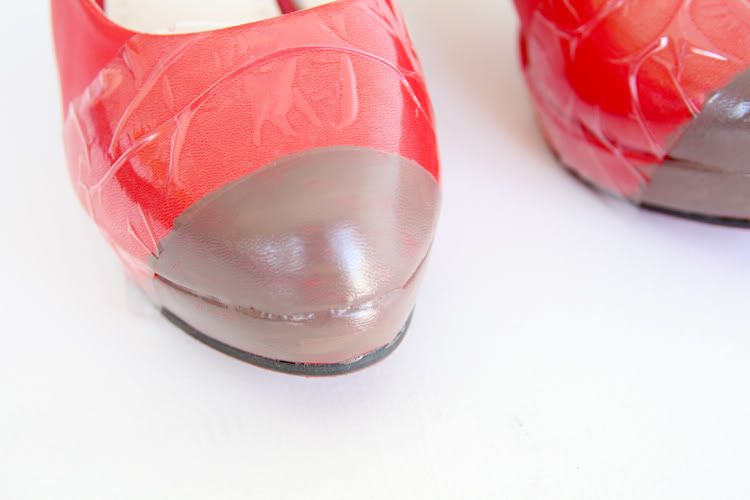
Step two: Mark off the area you want to paint with painters tape. If you are a real perfectionist you can measure it out to make sure it is even on both sides.
Step three: Mix white acrylic paint with a bit of water for first layer to help it adhere to the leather. Start brushing onto leather from tape down to avoid too much leakage under the tape.
Step four: After the white dries, bring out the neon paint and do the same without water added. The white acts as a primer so that your color will pop bright against the muted leather. I used a blow dryer during this process because I couldn't take the waiting in between layers to paint. Works miraculously to get an even coat.
Step five: When you're finally satisfied with the painted color cover the non painted leather with paper or cover with a magazine of some sort. Last minute I didn't like the feeling of the rough paint so ran to the craft store for glossy acrylic spray coat. This helps protect the paint from water and wear while also giving it a soft smooth finish like the leather!
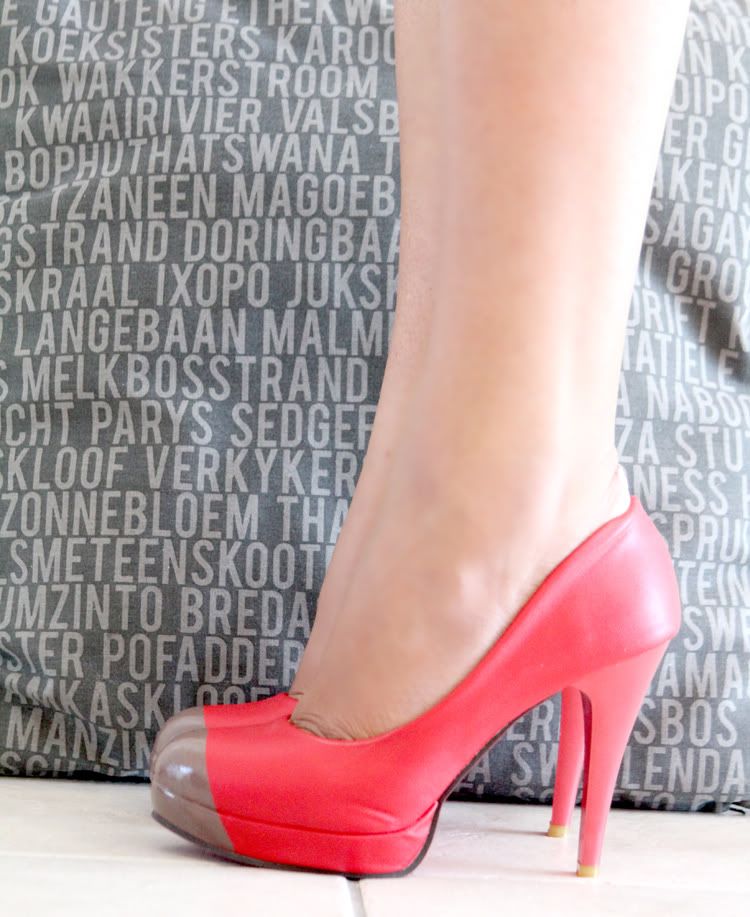
Let dry for 2 hours untouched and you're done!


 Labels:
Blue,
Bright,
Colour Block,
Neon Shoes,
Orange,
Pink,
Shoes,
YDE
Labels:
Blue,
Bright,
Colour Block,
Neon Shoes,
Orange,
Pink,
Shoes,
YDE